This post may contain affiliate links, which means I’ll receive a commission if you purchase through my links, at no extra cost to you. Please read full disclosure for more information.
This super-soft bread made with water, white flour and olive oil is a pure delight. Cooked at a very high temperature, it inflates with air like a small balloon, which also makes it ultra-light.
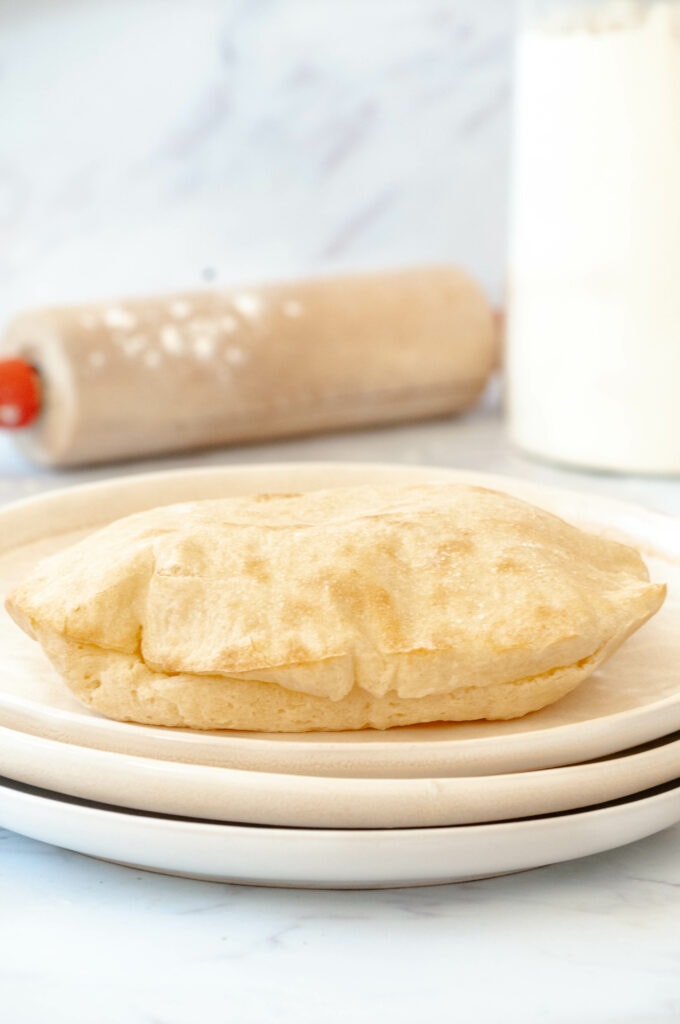
And the great thing about pita bread is that it has so many different uses! It can be garnished with meat, vegetables or cheese, or used as a sandwich, as in this recipe for gyros recipe, or even as cutlery in curry. Accompanied by a muhammara (bell pepper spread), a Çilbir (Turkish breakfast), hummus or even eggplant caviar is just as divine!
Greeks, Turks and Lebanese: many peoples compete to create pita bread, but everyone agrees that it's delicious.
💙 Why you'll love it
- It has so many different uses
- It can be frozen
- It makes you travel and is really delicious
🥰 Chef's tips
Raising the pita dough
- To ensure that the dough rises well, I place cling film on the bowl and tape it down so that no small trickle of air can get through. You can do the same with a bee-wrap. What's certain is that a simple cloth, as often seen in recipes, is far less effective.
- Leave the dough to rise in a warm place, at around 85°F/30°C. I turn on my oven at 85°F/30°C. Once it has reached temperature, I turn it off and leave it to cool, with the door open, for 10 minutes. If, like me, you have a thermometer, even better! I then put my bowl with the pita dough in the oven. I use this technique for both lifts.
- Cut the ball of dough between the 1st and 2nd rises into small pieces: this will reinforce the gluten network and allow the dough to rise.
- Two hours: that's approximately how long it takes for the dough to rise and double in volume.
Spread the pitas
- Roll out gently with a rolling pin, so as not to crush the dough too much and remove the gluten.
- Pay attention to the thickness of each dough piece as you roll it out. Too thick or too thin a dough prevents the pita from puffing up like a little balloon and forming its famous pocket. 3-4 mm seems a good thickness. But better too thin than too thick!
- Roll out with the rolling pin directly on the baking paper, without putting flour underneath. Just lightly flour your roll.
- Wait until the 1st pita is cooked before lowering the second and so on: lower at the last moment just before putting in the oven. While the dough pieces are in the open air, waiting to be lowered and baked, don't leave them in a draught. If the dough forms a crust on top, it won't rise as well. I recommend covering them with a clean tea towel.
Baking pitas
- Preheat your oven to 500°F/260°C in natural convection mode, and leave it to heat for a further 5 minutes once it's hot.
- Place your pitas one at a time in the oven, stacked in the center (both high and wide).
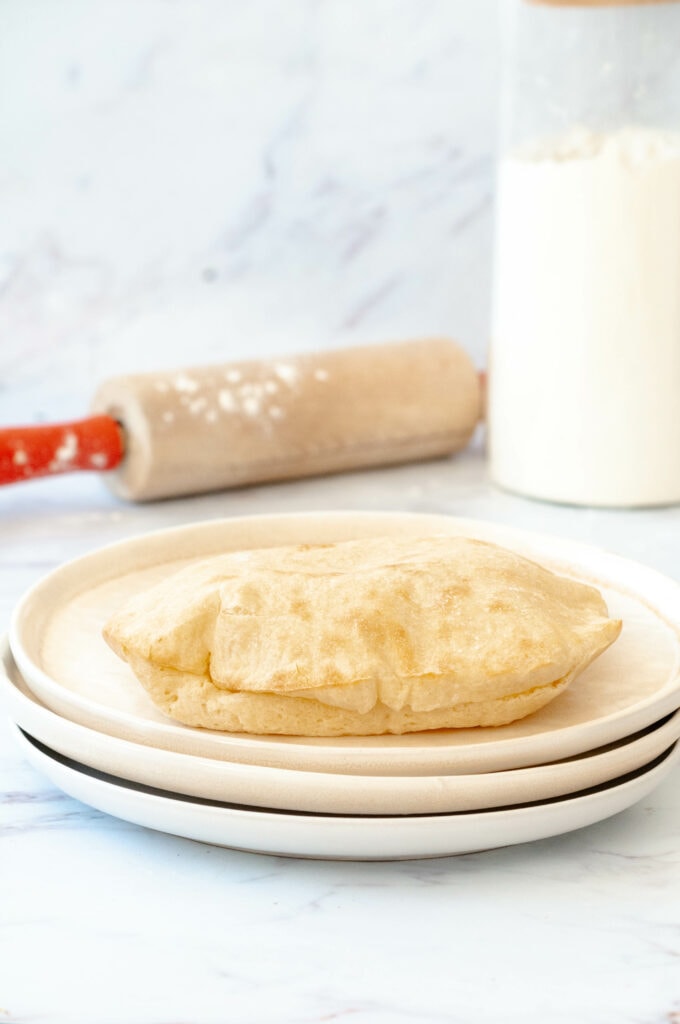
- Stand in front of the oven and watch the show: after 1 or 2 minutes, the bread will start to puff up. And after about 3 minutes, it's cooked!
- It's rare, but it can happen that some pita breads puff up little or not at all. I've had them before, and they're delicious anyway: use them as a sandwich base, or try filling them anyway.
🤔 Frequently Asked Questions
Brush them with a very light drizzle of olive oil. You can then reheat them in a frying pan or in the oven at 300°F/150°C for 5 to 10 minutes. Don't use the microwave, which will make them soft.
It's best to eat them as soon as they come out of the oven! Alternatively, you can place them in an airtight container or freezer bag in the fridge and keep them for 1-2 days. Don't forget to reheat them before eating.
Of course you can! Let them cool, then place them on a plate or baking sheet lined with parchment paper. First, you'll "pre-freeze" them. After 3 hours, you can put them all in the same freezer bag, removing as much air as possible and remembering to write the date. This way, they can be kept for 2 to 3 months.
I've had them before, and they're delicious all the same. You can use them as a sandwich base or try to garnish them. There may be several reasons for this: the dough wasn't hydrated enough or became dehydrated, the temperature during rising was too high or not high enough.
🤩 Other recipes for pitas
- Instead of naan in this butter chicken and mozzarella naan sandwich
- Instead of focaccia in this focaccia sandwich with burrata and spring vegetables
If you make these pita, it would be so nice to leave me a comment and rate the recipe ⭐️⭐️⭐️⭐️⭐️. You can also tag me on Instagram, Pinterest, Facebook or Tik Tok, or even send me a photo, I love seeing my little dishes in your homes!
📖 Recette

Easy homemade Pita bread (in oven)
Ingredients
- 2 cups all-purpose flour (250g)
- 1 teaspoon instant dry yeast (5g)
- 1 teaspoon salt
- ¼ cup Greek yogurt (50g)
- ½ cup water lukewarm (120ml)
- 2 tablespoons olive oil
- 1 teaspoon brown sugar
Instructions
- Mix the Greek yoghurt and lukewarm water in a small bowl. Place the flour and yeast in the bowl of your food processor, mix, then add the yogurt-water mix and sugar, and mix again.
- Add the salt and olive oil, then restart the food processor. Once a ball has formed, collect the dough and knead it with your hands until smooth and slightly sticky.
- Place the ball in a large bowl and drizzle a little olive oil over it (to prevent the dough from crusting), which you spread with a pastry brush.
- Place a sheet of cling film on top (no air should get through - you can use a bee-wrap if not) and leave the dough to rest for an hour in a warm place (around 85°F/30°C).
- Roll out the dough on a floured work surface and cut into 4 roughly equal pieces. Use your hands to shape the dough into balls and place them back into the bowl. Tape it down again and leave to rest for another hour.
- Heat your oven to 500°F/260°C on natural convection/static heat high and low. Once hot, wait a good 5 minutes, during which time remove the first dough piece and shape it into a ball with your hands. Using a lightly floured rolling pin, gently roll out the dough directly onto a sheet of parchment paper. Cover the remaining dough pieces with a clean kitchen towel to prevent them from crusting.
- Place the sheet on an oven tray, right in the middle (in height and width). Wait in front of it, and the show is magical: in about 3 minutes (sometimes 3 min 30), the bread will puff up like a little balloon.
- Take the first pita out of the oven, roll out another loaf and bake. It's crucial to roll out the dough pieces one at a time and bake them one at a time too. Repeat until you've used up all the ingredients.
Nutrition
This post may contain affiliate links, which means I’ll receive a commission if you purchase through my links, at no extra cost to you. Please read full disclosure for more information.


Répondre